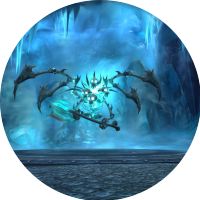
Icecrown Citadel
Instance and Boss tactics
Intro
Icecrown Citadel (ICC) is a level 80 raid with 10man or 25man versions.
There is no distinction between Heroic and Non-Heroic saves so each boss should be fought at the highest difficulty that the raid can manage.
Icecrown Citadel is located in southern Icecrown a short flight west from Dalaran.

Inside the entrance to ICC are a number of NPCs and Vendors who sell Tier 10 armor in exchange
for
Entrance trash
In addition to the mobs that are standing around the two rooms before Lord Marrowgar there are four hidden traps (two in each room) that should be disarmed by rogues. If they are triggered then each one will awaken a large mob and several spiders which will attack the raid. It is generally preferable to avoid them as they can waste time and if the entire raid is not ready yet can cause a wipe.
Lord Marrowgar
The first boss in ICC is Lord Marrowgar, a flying skeletal being. Marrowgar has two main phases which he alternates between until he has been defeated.

Lord Marrowgar: Main Phase
In the main phase Lord Marrowgar will attack the tank, while periodically shooting flame walls and spiking players in bone. It is important to avoid the flames and DPS the spikes down quickly.
DPS (except Hunters) stack on top of the boss to avoid the flames as they start a little way away from the boss. DPS down the Bone Spikes as fast as possible.
Hunters Stay together as close to the boss as you can be, avoid the flames as they appear. DPS down the Bone Spikes as fast as possible.
Healers stack on top of the boss to avoid the flames as they start a little way away from the boss.
Main Tank face Lord Marrowgar away from the raid - towards the right of the room. You can run along the right wall to get into position before the pull. easily.
Off Tank stack on the Main Tank to help soak the cleave damage.
Lord Marrowgar: Bone Storm
During Bone Storm, Lord Marrowgar will move around the room dropping flames that spread out from him in a X shape.
DPS avoid flames.
Healers avoid flames.
Main Tank avoid flames, stay around the same place so Marrowgar comes back to the same place when he finishes Bone Storm.
Off Tank avoid flames, stay near the Main Tank for when Bone Storm finishes.
Lady Deathwhisper Trash
The two large groups of mobs in the middle of the room can be pulled all together or split left and right depending on your group. Once these have been killed the large mobs on the left and right can be pulled. They will put a debuff on the tank called [xxxxxxxxx]. The other tank should immediately taunt the mob and the tank with the debuff should run away from the rest of the raid.
Lady Deathwhisper
The second boss is Lady Deathwhisper, she has two phases - mana shield phase and health phase.

Lady Deathwhisper: Mana Shield Phase
In the first phase adds will spawn on the left and right and back of the room. They should be tanked and killed quickly. When not killing adds, DPS Lady Deathwhisper's mana shield until it is depleted.
DPS kill the adds on the left, right, and back of the room as quickly as possible each time they spawn. Avoid the green Death and Decay AOE on the ground. Then DPS Lady Deathwhisper's mana shield down.
Healers avoid the green Death and Decay AOE on the floor.
Main Tank tank adds on one side (usually left), and grab the one at the back of the room in 25 player mode.
Off Tank tank adds on one side (usually right).
Lady Deathwhisper: Health Phase
Once Lady Deathwhisper's mana has been reduced to zero she will start moving around and attacking the tank. She casts a stacking debuff to reduce tank threat.
DPS avoid the green AOE.
Healers avoid the green AOE.
Main Tank taunt and hold aggro for as long as you can with the stacking debuff that reduces your threat. Move the boss away from green AOE as required.
Off Tank build threat on the boss and be ready to take over when the main tank loses aggro.
Ramparts Trash
Horde go right, Alliance go left
TIP An effective way of speeding this section up is to have everyone mount up before any mobs are pulled, then run through them all following the tank. Once they are all gathered up you can AOE them down quickly.
Gunship Battle
The third fight in ICC is between the two faction's airships. Easier than any other fight in ICC it is recommened to do this fight in Heroic mode in order to obtain Herioc quality loot - including a number of Best in Slot items for different classes.
IMPORTANT Before the fight starts talk to [xxxxx] and get a Rocket Pack from him. Make sure you equip this Rocket Pack (in the Shirt slot).

Cannons
Four DPS (or Two in 10man) will need to jump on the Cannons on the side of the ship. They are responsible for actually defeating the enemy ship and ending the fight.
Start As soon as the fight starts and the ship begins to move, start spamming the 1 key. Watch your mana/energy bar as you build heat in the Cannon. Each shot adds 10 heat which is slowly drained over time. The ability on the 2 key deals damage based on how much heat you have built so you want to get to the 89-99 range before the ship pulls alongside the enemy ship. As soon as you can hit the enemy ship press 2 to unleash the heat you have built.
Main rotation Once alongside the enemy ship, aim for the mobs on the enemy ship so you can AOE them down while shooting the ship. At this point you can start your regular rotation of 1-1-2.
Freeze When an enemy mage freezes you out of the cannon wait until your teammates kill the mage, then jump back in your cannon and continue with 1-1-2.
Adds on your ship
Periodically a portal will open in the middle of your ship and a number of adds will come through it. The tank should collect these adds and DPS should kill them.
DPS AOE the adds down, try not to pull aggro off the tank.
Tank hold aggro on all the adds until they are killed. Note that the adds spawn one at a time over a short period so you need to ensure you aggro each of them as they spawn.
Cannon Freeze & Mage Spawn
Periodically a Mage will spawn on the enemy ship and will freeze the Cannons until it is killed.
DPS after the Tank has jumped across to tank Saurfang, jump over and kill the Mage quickly. Then jump back to your ship. Avoid the Tank and Saurfang as you can get cleaved and killed.
Tank when the Mage spawns immediately jump across to the enemy ship grab aggro on Saurfang. Try to tank him on the edge of the ship so your healers are in line of sight. Face Saurfang away from the raid so he doesn't cleave anyone running past.
Watch for the mage dying and as soon as all the DPS have jumped back to the friendly ship, jump across with them.
Watch Saurfang's stacks of [xxxxxxx] and don't jump back across until they have reset. Hunter and Warlock Pets often cause Saurfang to continue gaining stacks after you have jumped back.
Deathbringer Saurfang
The fourth fight in ICC is Deathbringer Saurfang, this fight requires everyone to focus on their roles carefully. Saurfang has a soft-enrage at 30% health, at which time the fight gets much harder so it is preferrable to use Heroism/Bloodlust at this point to finish the fight as quickly as possible. This fight has very simple tactics but requires everyone to follow them quickly and efficiently.

Deathbringer Saurfang
Tanks should switch when DBS casts Mark of Blood, DPS should kill adds quickly without being hit by them.
Melee DPS should DPS Saurfang throughout the fight. Help kill the adds if you can do so without being hit by them - watch your aggro carefully. Stuns should be used to buy some time to kill them.
Range DPS should spread out as much as possible. DPS Saurfang but switch to adds IMMEDIATELY when they spawn. Avoid being hit by them at all costs.
Hunters watch the timers for when the Blood Beasts spawn and BEFORE they spawn place a Frost Trap next to Saurfang to slow them down so they are less likely to hit anyone.
Healers watch for [Mark of the Fallen Champion] being cast on raid members. This debuff deals a large amount of damage to that player for the rest of the fight so they will need to be healed constantly. The longer the fight goes, and the more the Blood Beasts hit players, the more [Mark of the Fallen Champion] will be cast.
After Saurfang soft-enrages at 30% health the rate these are cast will increase and the fight gets much harder for healers.
Tank tank Deathbringer Saurfang where he spawns, when one Tank gets the [Mark of Blood] debuff the other tank must IMMEDIATELY taunt otherwise Saurfang heals quickly. Ignore the adds as if you try to tank them they will hit you, giving DBS more Blood Power.
Deathbringer Saurfang
The fourth fight in ICC is Deathbringer Saurfang, this fight requires everyone to focus on their roles carefully. Saurfang has a soft-enrage at 30% health, at which time the fight gets much harder so it is preferrable to use Heroism/Bloodlust at this point to finish the fight as quickly as possible. This fight has very simple tactics but requires everyone to follow them quickly and efficiently.

Deathbringer Saurfang
Tanks should switch when DBS casts Mark of Blood, DPS should kill adds quickly without being hit by them.
Melee DPS should DPS Saurfang throughout the fight. Help kill the adds if you can do so without being hit by them - watch your aggro carefully. Stuns should be used to buy some time to kill them.
Range DPS should spread out as much as possible. DPS Saurfang but switch to adds IMMEDIATELY when they spawn. Avoid being hit by them at all costs.
Hunters watch the timers for when the Blood Beasts spawn and BEFORE they spawn place a Frost Trap next to Saurfang to slow them down so they are less likely to hit anyone.
Healers watch for [Mark of the Fallen Champion] being cast on raid members. This debuff
deals a large amount of damage to that player for the rest of the fight so they will need to be healed
constantly. The longer the fight goes, and the more the Blood Beasts hit players, the more [Mark of the
Fallen Champion] will be cast.
After Saurfang soft-enrages at 30% health the rate these are cast will increase and the fight gets much
harder for healers.
Tank tank Deathbringer Saurfang where he spawns, when one Tank gets the [Mark of Blood] debuff the other tank must IMMEDIATELY taunt otherwise Saurfang heals quickly. Ignore the adds as if you try to tank them they will hit you, giving DBS more Blood Power.