
Trial of the Crusader
Instance and Boss tactics
Intro
Trial of the Crusader or TOC is a level 80 raid with 10man or 25man and both normal and heroic
difficulty.
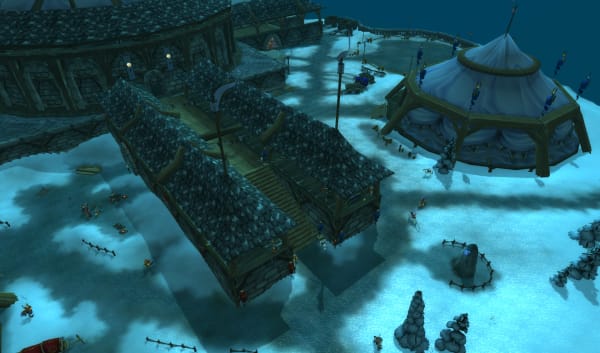
The entire raid takes place in a single room (and beneath it) and there is no trash to kill between bosses.
TOC is located in north-east Icecrown, a short flight due north from Dalaran.
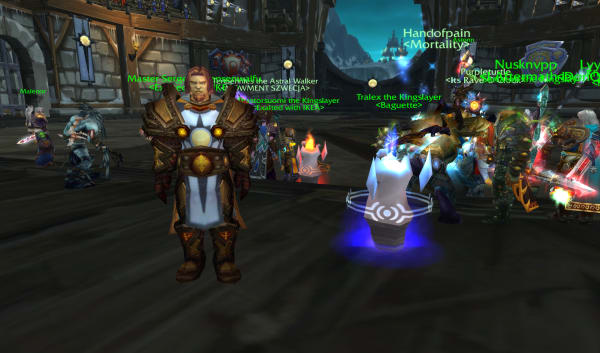
Once everyone is inside and ready to go the someone will need to speak to Barrett Ramsey to begin the first fight.
The Beasts of Northrend
The first fight in TOC is comprised of three distinct boss fights which occur one after the other with no downtime.

Phase 1: Gormok the Impaler
After talking to Barrett Ramsey Gormok the Impaler enters the room from the large door opposite the entrance.
Melee DPS should DPS the boss from behind, and try to cleave down the adds.
Range DPS should spread out around the boss and DPS while avoiding the fire he throws on the ground.
Healers spread out around the boss and heal while avoiding the fire he throws on the ground.
Main Tank tank boss where he spawns but turn him to one side so the MDPS can get behind him easily.
Off Tank gather adds as they spawn and bring them to the boss so they can be DPSed easily.
Phase 2: Acidmaw & Dreadscale
Shortly after Gormok the Imaper dies, Acidmaw & Dreadscale enter the room from the same large door.
Melee DPS quickly finish off the adds from Gormok, then move to Deadscale (on the right) and DPS from behind. Watch out for the circles of poison on the ground that slowly expand. After Deadscale dies, switch to Acidmaw.
Range DPS quickly finish off the adds from Gormok, then switch to Deadscale (on the right) and DPS from near the center of the room. Watch out for the circles of poison on the ground that slowly expand. After Deadscale dies, switch to Acidmaw.
Healers stay near the center of the room as you will probably be snared and need to reach both sides.
Main Tank tank Deadscale (on the right) facing him away from the raid. Watch for poison circles on the ground under boss and move away from them so DPS don't stand on them.
Off Tank tank Acidmaw (on the left) facing him away from the raid. Watch for poison circles on the ground under boss and move away from them so DPS don't stand on them.
Phase 3: Icehowl
Shortly after Acidmaw & Dreadscale both die, Icehowl enters the room from the same large door.
All DPS should DPS Icehowl when you can. When he throws you to the edge of the room and begins to charge, get out of his way so he hits the wall and is stunned. While he is stunned he takes double damage so save your CDs for that.
Hunters watch if Icehowl charges and hits a player he will enrage. Make sure you have your Tranquilizing Shot ready just in case to remove the enrage.
Healers when he throws you to the edge of the room and begins to charge, get out of his way so he hits the wall and is stunned.
Tanks when he throws you to the edge of the room and begins to charge, get out of his way so he hits the wall and is stunned.
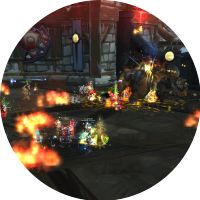
Lord Jaraxxus
The second fight in TOC is a pretty simple tank and spank fight with some adds that need to be DPSed quickly.
Lord Jaraxxus
After talking to Barrett Ramsey Jaraxxus enters the room near the center.
DPS all DPS the boss, if you get the Legion Fire debuff, run away from the raid until it is over. Switch to Portals and Volcanos as they appear. Otherwise cleave the adds as you DPS the boss.
Healers watch for Incinerate Flesh debuff on raid members and overheal that person until the debuff is gone, or it explodes dealing massive AOE raid damage.
Main Tank should Tank boss where he spawns and help the OT gather adds.
Off Tank gather adds as they spawn and bring them to the boss so they can be DPSed easily.
Faction Champions
The third fight in TOC is a PVP style fight. You will be matched against members of the opposing faction. Aggro resets frequently so this isn't a fight that the tanks can hold aggro.

Faction Champions
After talking to Barrett Ramsey be sure that everyone is standing well back from the side that the champions spawn on so they do not pull them. The raid leader will usually mark the order that the champions will be killed in.
DPS should DPS the current target, using PVP abilities such as CCs, interrupts, and defensive abilities as required.
Healers try to stay away from the enemies and use PVP abilities such as CCs, interrupts, and defensive abilities as required.
Priests Mass Dispel is exceptionally useful here so one priest is often assigned to cast it constantly.
Tanks as aggro resets constantly you can't tank this like a normal boss. Instead pick a target (or have it assigned to you) and taunt it as much as you can to keep it off squishier raid members.
Twin Val'kyr
The fourth fight in TOC is against a pair of Val'kyr soldiers. Fjola Lightbane and Eydis Darkbane use light and dark powers to damage the raid and heal themselves.

Twin Val'kyr
Start the fight by talking to Barrett Ramsey and the two Val'kyr will enter on either side of the door opposite the entrance. Around the room four Essenses spawn - two light and two dark. Everyone should right click on the dark Essense before the fight starts to become protected against Light damage. All DPS should always have the Essense of the color opposite to the Val'kyr they are attacking. The Val'kyr have two main abilities to watch out for; Light/Dark Vortex and Shield of Light/Dark.
Light/Dark Vortex When either twin begins to cast this all DPS and Healers should make sure they have the same color Essense as the vortex. Right click the Essenses to change to them. Always make sure you are attacking the opposite color Boss to the Essense you have.
Shield of Light/Dark When either twin begins to cast this all DPS should ensure they attack the Twin casting it (Preferably with the opposite Essense). After the DPS has broken the shield someone needs to Interrupt the cast to prevent the Val'kyr from healing themselves.
DPS make sure you have the Essense opposite color to the Twin you are attacking. Switch Bosses and Essenses as required for Vortex and Shield.
Healers make sure you have the same color Essense as Vortex when it is cast.
Main Tank take the Dark Essense and tank Fjola Lightbane around where she spawns.
Off Tank take the Light Essense and tank Eydis Darkbane. Bring her over to stack on the other boss so they can be cleaved down together.
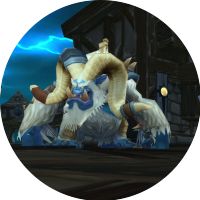
Anub'arak
The fifth and final fight in TOC is against Anub'arak. After a brief appearance from The Lich King where he breaks the floor of the arena, sending the raid down into the tunnels beneath.

Phase 1
Fighting Anub'arak, killing adds as they spawn. RDPS needs to shoot down the ice spheres.
All DPS should DPS Anub'arak from behind, and once the OT has the adds securely by Anub'arak kill them quickly.
RDPS shoot down the Ice Spheres to create the patches of ice around the room.
Healers have nothing special to be aware of
Main Tank tank Anub'arak facing away from the raid close to an ice patch.
Off Tank gather the adds as they spawn and bring them to the boss so the DPS can cleave them down. Keep them on top of an ice patch so they can't burrow.
Phase 2
Anub'arak burrows and follows marked players while little adds spawn. Goes back to Phase 1 when Anub'arak resurfaces.
All DPS kill the adds. Anub'arak's spike follows a marked player slowly. Whoever is marked by Anub'arak stand on an ice patch.
RDPS shoot down the Ice Spheres to create the patches of ice around the room.
Healers Anub'arak's spike follows a marked player slowly. Whoever is marked by Anub'arak stand on an ice patch.
Tank keep adds from killing raid members. Be careful of the stacking debuff that the adds give when they hit you.
Off Tank gather big adds if they spawn and bring to ice patches.
Phase 3
At 30% Anub'arak casts Leeching Swarm which takes 10% health from each player every second. Pop Heroism/Bloodlust and all DPS cooldowns to finish the fight quickly.
All DPS pop all DPS cooldowns and burn Anub'arak down quickly, you may also need defensive cooldowns to help the healers.
Healers note the raid will be all losing health quickly, but you don't want to heal anyone higher than about 50%. Use small and AOE heals but make sure the tanks don't die.
Tank use your defensive cooldowns throughout this phase to help out the healers.